Monday, February 3, 2025

Frame bags: I think I may be half decent at these now

Shortly after I displayed my personal bag, my apprentice-brother expressed interest in one of his own. 


He already has examples of all the historical octopi I could find, so I found some clip art that would lend itself well to embroidery. Also found some examples of other extant bag handles and traced out a couple different ones than I had done before. Both bags in this post are made from moose antler, done both at the same time. For the general process on both of these, see my original post - not much has changed, aside from refining how I do the straps.


This one is the reign pouch for Duchess Anne FitzRichard.  The roses are from her heraldry, and the crochet snowflake was made by Lena Webster. I kept the weaving simple and narrow to use it in concert with the rabbit fur, since space in the composition was tight. Also swapped to a fingerloop braid for the top trim instead of a lucet cord - much faster and saved a lot of trouble for my fingers.

In both cases, I figured out that the best way to do the straps was to keep the pattern threads, rather than the edge threads, for the entire strap. The twist inherent in the round weaving turns the basic starting diagonal patterns into something considerably more interesting looking than they actually are. 

Sunday, February 2, 2025

Jouhikko project part 5: the thrilling conclusion


I had a couple of things I wanted to do aesthetically with the 4-string. One, include Anglo-Saxon art appropriate to the original Sutton Hoo lyre. Two, have metal fittings on the arms. Three, have a less massive tailpiece, both to reduce the visual impact of the tuners and reduce the dead vibrating mass behind the bridge.

Sourcing the artwork turned out to be harder than expected. When I actually needed art, all my search results for original art vanished into the aether. So, once again, I turned to Jonas Lau Markussen’s patreon and used the three pieces of art that were available. Fittingly, two birds and a horse… not bad, not bad. I took measurements and made a rough profile of the lyre on the computer, which I used to lay out the artwork symmetrically. From there, I got out the carbon paper and the woodburner and did as I did before.

The metal fittings weren’t particularly hard to source, but did delay the project over a month. There exist reproductions of the original enameled fittings, but I couldn’t use them because the arms on my instrument are a different size. Such are the troubles of being “inspired by” rather than a “replica of.” Since my arms were only 3/4” wide, I found a set of period-appropriate belt fittings that would fit unobtrusively and were available mirrored.

A long time went by with no shipping confirmation, so I eventually emailed, and found there had been a production error. I had ordered gold-plated, but they had made bronze-only and were waiting on a replacement. I said “screw it, just send the bronze ones,” and soon enough they arrived.

To attach them, the fittings had two posts in the back. On leather, one would fold those over like a staple. That doesn’t work in wood, nor does trying to use them like nails - they’re too soft, and making a hole loose enough for the nails to survive would risk the fittings falling off. Gluing would risk the glue losing its adhesion over time or bonding poorly to the metal. So I drilled holes of an appropriate size, then wallowed them out into an inverted cone and countersunk them to accommodate the solder. Then I bent the tips of the fitting posts at right angles, so they made little hooks. The holes were then filled with superglue before inserting the fittings. This way, nothing could escape because it physically won’t fit out. The superglue is wider at the base than the tip, so it can’t escape the hole, and the bent-over posts hook into the glue.

For the fine tuners, I found a different style than I had used on the three-string. The other ones are meant to go on the end of a tailpiece and extend out past it; these are on a flat pedestal and fit in a keyhole shape. I carved a small rectangular tailpiece from the same antler piece I used last time, reminiscent of a simple dowel that would be normally used for string anchoring with no fine tuners. I was surprised to find the antler was tolerant of being carved rather thin without succumbing to stress. I used a section of mini-paracord instead of braiding my own this time, with two tiny scraps of leather protecting the soft cedar soundboard from getting dug into too hard.

Aesthetically, aside from the only finish available being shiny nickel, I was happy with this setup, but these string adjusters weren’t set up for ball end strings. The other tuners had forks on the business ends, which was handy for holding onto the knot at the end of the string. These only have a single hook, which means that has to go in the middle of the string and get twisted into the string itself. Getting the strings on the instrument initially was way harder on this one - adding each string rotated the tailpiece side to side, and the tiny scoop intended to retain the string had almost no holding power. Managing that while trying to twist each string into existence was chaos. It also exposed the other problem with these tuners - in practice, all of the tension gets borne by one half of the hairs or the other, rather than going straight to the knot. In a bass string, this is fine. On a small, taut high string, this causes explosions.

My initial attempt was a G3D3G3D4 unison tuning with a flat bridge. Sounded cool, but I don’t know what to do with it, and neither does anyone else locally. Even the flat-bridge modern pagan musicians, who I would want to be able to cover, stick with three strings most of the time. Curving the bridge means re-tuning, because having two identical Gs that can’t be used at once is pointless.

So I curved the bridge, and tried tuning in fifths, GDAE, like a fiddle but an octave down. This is where my high D string broke, and I needed to swap back to regular fine tuners. This also meant that due to how I carved the underside of the tailpiece, with a thick rail at the front to bear the string tension, regular tuners wouldn’t fit. So I ordered some more tuners, being one short, and carved a new tailpiece from the beam of the same paddle. This one was even simpler than the last one - a few holes, a couple of notches, and polish up the slab.

Figuring out tuning the second time took some experimentation on which notes were possible and how thick of a string was needed. I kept GDAE initially, but with the low G failing to tune properly, I raised it an octave to be one note down from the A. Coincidentally, this made a similar tuning to the three-string, but with extended upper range. Now I was getting somewhere, because it played familiarly, but had extra utility. (Would have been really helpful trying to learn Silent Night for Yule.) Something still wasn’t quite right though; it sounded too recognizably like a violin, and it didn’t have that droning character when I changed strings. So I dropped the E by one note, for GDAD, and found the sweet spot.

Completing this retuning about a week before Coronet, I got to perform over dinner for King Fabian and Queen Eliska. I think everyone was too busy with dinner to record, but the instrument was well received, and I got to infodump at new people over the day. That was just recently, and further practice with the instruments awaits.


Friday, December 13, 2024

Jouhikko project part 4: Finishing the jouhikko


The cedar tops on my instruments from (website) are beautiful, but the downside of them is, they’re very soft. I had good success repairing a file mark in the top of the soundboard, and though I matched up the grain rather well, it was still very obvious as the only feature on the face of the instrument. So, while I hadn’t originally planned on heavy ornamentation, the decision was made for me. Nobody is going to look at the screwup if there’s pretty pictures next to it!

While I was considering my options, it occurred to me that I probably should have planned for ornamentation the whole time in the name of authenticity. The “oh look at the pretty wood” mindset is to some extent modern. Many wooden items found in graves are made of woods that would have been imported, like beech, so of course people of the time also appreciated a nice *exotic* wood. But that doesn’t mean that they forewent ornamentation in the name of showing the wood off. For them, wood was what you made everything out of, and keeping it plain meant you didn’t have the time or expertise to do anything else to it; so simply being wooden wasn’t very interesting. Nowadays, where our lumber is frequently terrible, carpentry is a niche skill, and cheap items are made of plastic, clean work and a good polish is enough to be impressive.

So we see the decoration-heavy mindset in the Trossingen lyre, which has a scene of a shield wall kolrosed into the face, along with an ornamental pattern. Kolrosing is much like scrimshaw conceptually - one scratches the design into the wood and then applies pigment into the scratches.
Recproduction by Michael J King


I decided that a nearly finished lyre would be the wrong time to learn yet a new process, so I stuck to what I knew and broke out the woodburner. The original design wouldn’t fit my instrument, nor would it make sense held vertically, so I forged my own path. On the top, where I had the most canvas, I put my Ringerike-style hippogriff design. This was a bit of a challenge, as this was the smallest I’ve drawn it by hand. On either side of the tailpiece, I grabbed a piece of border art from Jonas Lau Markussen, who has a lot of great resources on Viking and Anglo-Saxon art. 
 

Once the wood burning was done, I cleaned it up with 800 grit sandpaper, then moved up to 2000 grit and applied Danish oil before a final polish and oil with 3000 grit. I was pleased to get at least a little chatoyancy from the maple and some fun grain structure.
 

I wanted to do something special for the tailpiece, so I got a very nice size antler shovel from Scene of the Crash reindeer farm. I cut the shape out on the scroll saw, thinned it out, and drilled holes for the tailgut and fine tuners. While the fine tuners aren’t exactly period, they save so much sanity versus pure friction pegs. Three circle-dot motifs, added with my modified screwdriver, complete the look. This was actually the first piece I finished, even before I bought the wood.

Modern lyre players recommend nylon for the tailgut, since it isn’t sensitive to humidity. Many luthiers opt for paracord. If you have an unobtrusive color, this can look fine, but I decided to be different and did a ten-strand fingerloop braid of artificial sinew. Since this is waxed nylon, it would stay put just as well as the paracord with a hopefully less modern look.

 
The first iteration bridge was cut from 3/16” maple and tapered down in a simplified version of a violin bridge. Period bridges, such that we’ve recovered, are frequently quite thick and are sometimes made of amber. However, a massive bridge also noticeably dulls the sound, so I didn’t want to go that route if I could avoid it.

My strings, as per tradition, are made of twisted horsehair. I really wanted black horsehair, which is coarser and more textured, but that was out of stock, so I stuck with bleached. My mentor has a video demonstrating the process (in nylon) much better than I can type it out here:


The bow was another sentimental piece. Constructing a simple, untensioned bow is all about finding the right stick. In this case, a willow branch is ideal - light, strong, stiff, and the right diameter directly off the tree. I went to the Fuller Lakes trailhead, which was where I did a three-generation camping trip as a young teenager. A ways off the trailhead, to the side of the road where nobody goes, was the Perfect Stick- half an inch wide at the base with a gradual taper, with smooth bark, only a few tiny leaf buds, and growing more or less straight up.

In lieu of steam bending, I just boiled the end until it took a curve by tightening some paracord around a roll of duct tape. Taking the bark off was initially an accident. I tried to clean my cut edge and accidentally removed a strip, so I just kept going and found I liked the texture. To mount the hair, I cut a slit in either end of the stick, knotted the hair on either side, and wrapped some bark around the ends with some liquid hide glue over top to secure everything. Gentle application of a flame helped to tighten stray hairs that didn't want to maintain tension.


Mine below, original above

The biggest adventure at this stage was after assembly, trying to figure out string diameters, bridge weights and proportions, and all the other variables turning a weird box into an instrument. I eventually settled on a thin, wide bridge that somewhat evokes the original, and replaced the tailgut with a six strand braid. I’m mostly happy with the sound, though for a long time the D string (in my attempted D4-A3-E4 tuning) has had some kind of resonance that makes it louder than the others. At a mere 17 hairs, no lower tension can be reasonably had; the problem seems to be a wolf note, where the natural resonance of the instrument body suddenly shines through. Placing a third finger on the A string and hitting the d4 in unison made the instrument practically shout. All that said, as a first instrument to be completed, it was a rather good success. Imperfect, certainly, but considering how little I really knew for sure about what I was doing, it could have been far worse.


In pursuit of fixing that wolf tone, I've restrung it since, and dropped my tuning by a step overall, to produce CGD, from viewer right to left. This gives it a more rustic sound and moves the D note away from the bass bar, which seems to avoid most of its problems. It's still not a loud instrument by any means - the sound box is still relatively small, and perhaps thicker than necessary, so it can only be so loud. But of the two instruments, this one is shallow enough that I can clamp a bridge pickup onto it. If I need to be heard across a room, I can put a pocket amp discreetly under my chair.

Jouhikko project part 3: construction

Constructing a lyre via hollowing isn’t a hard process on paper - there aren’t a great lot of steps, broadly speaking. And it can be as hard or easy of a process as you like, depending how intent you are on good results.

I am very intent on good results.

With the large design questions settled beforehand, I went over to my friend’s garage and got to work. The first step is cutting out the general profile on a bandsaw. Since making fine turns with a bandsaw wasn’t going to work, I radiused all of my inside corners with the drill press. On the three string, I left the wood inside the yoke in place for the time being - I wasn’t going to cut through the head of the instrument, and no jigsaw was available. For the four-string, I meant to do a tongue and groove joint anyway, so the bandsaw accomplished most of the material removal, save for some remnant at the shoulder. 
 

After that, reducing the depth of the arms would give me handholds while doing everything else. As my boards were too wide for the bandsaw, I did this with a forstner bit in the drill press, by drilling from the backside. I couldn’t get exactly to size, because the bit has a spike in the center. That meant I had to stop just short of the spike leaving a hole in the arms when I was done, which left at least an eighth inch of extra material clinging on for the time being.


After this, I needed to define the slope on the back of the instrument, so I re-traced the angle and removed the relevant material with a belt grinder. Since hollowing was dependent on the drill press, having the exterior shape defined first meant that I could make the inside and outside parallel reliably.


The last and most time consuming step that I got done for both instruments that weekend was the rough hollowing itself. I started with a forstner bit, as with the back side of the arms. The table on the drill press was set to roughly 1/4” down, so as to avoid the aforementioned hole problem. The four-hole jouhikko was actually thicker than the maximum throw of the drill press, so my initial drilling was simply as far down as possible. The second drilling targeted roughly 3/16”, but this time, the forstner bit had its tip ground off. This caused a fair bit of wander until it found purchase, but it made a mostly flat bottom, save for a faint ring around the outside and a raised dot where the cutting surface was gone. Doing this, I averaged five gallons of wood shavings per instrument, as measured by overflowing the scientific precision garbage can.

On our second day together, we went over to a table saw and engaged in joinery cutting, where we cut the tongue and groove joint for the four-string and broke down of a spare maple board. Parts from that would be useful for pegs later.


At home, the longer process of refinement could begin. I took the jigsaw and cut out the last piece from the three-string, then looked to the joinery on the four-string. Unbeknownst to me, a lot of tension had been released from the wood, so the arms had moved together by roughly 1/4”. So, I trimmed the yoke to fit… and discovered my mistake. Fortunately I only had to buy a little extra wood to cut a new yoke, and my caliper and router work was precise enough that it fit perfectly. Almost makes me feel like a real woodworker.

Whoops

More work on a bench sander squared up the outside of the bodies and removed the worst of the 60-grit texture. This handled the flat areas, but the bottoms of the arms had jagged excess from the forstner bit. This cleaned up with the router, as did the outside radius on the yoke. It also cleaned up the inside of the body beautifully up to an inch down. That’s as far as my 1/4” shank tool would go.

Special attention was required for the base and inside of the arms, and the tailpiece hooks. The arms took a half-round file to flatten out the imprecise cut at the base of the arms and keep the curvature at the base of each arm consistent in all dimensions. The file was also the best way to keep the insides of the arms straight.

I cut out the bottom (and on the four-string, the top) of the tail hook with a hand saw and did the rest of my contouring with hand files. The round file gave a nice profile for the actual hook portion with minimal extra cleanup.

To get the back face down to thickness, I put a straightedge across the face and measured down with a caliper. Both instruments were quite thicker than I figured necessary at this point, so cleaning up the last of the sides would go hand in hand with stock removal from the bottom. I set my cleanup depth in several locations with a small drill bit with tape around it - once the hole disappeared, I would be done sanding. Once again, the file sander was the best tool for the job, since anything that removed material faster didn’t fit in the space.


My original bracing was made from maple, until I read that it was best to match the wood that the soundboard would be made from. I ended up with extra cedar left over, so I carved bass bars and soundposts from the leftovers of the same boards on each instrument. The soundposts were hand-carved to rough circles about as thick as the soundboards were wide. The bass bars were whittled and sanded to a somewhat traditional shape, with a bump in the middle and a gradual taper to the ends, so the greatest stiffness would be right around the bridge.
 

My sound holes weren’t especially scientifically laid out, save that I had roughly the right clearance for where the bridge would go and space for the bracing. I went with a layout vaguely resembling the original on the Trossingen lyre, and did something a little different for the sake of difference on the Sutton Hoo - no surviving reference on that one, so I assumed that it would be roughly like its contemporaries.

Not all of my original maple bracing went to waste, as the maple jouhikko ended up a little thin in the back. When I found I could flex it slightly with my fingers, I was worried that it wouldn’t support the soundpost. A maple bass bar added to the back fixed that.


I had a particularly new experiment for this project in that I decided to use hide glue for assembly. Reports online said that regular wood glue dampened sound and hide glue didn’t, and if worst came to worst, I could open the instrument again. Rehydrating the glue to the correct consistency was an experiment, but overall I didn’t notice any of the smell that I had heard about, and the glue was easy to use.
 
 
I did cheat slightly and glued my soundpost to the top board after experiments trying to wiggle it into place through the holes went poorly. It also helped me set the length of the posts correctly. I found out afterwards from Reddit that my bass bar placement was technically backwards - it should be parallel to the strings. The way I installed it, it would be… on a violin, where the strings come together on the fingerboard instead of fanning out between the arms. That’s something to learn from on my next instrument, since I plan to do one more eventually. Meanwhile, both of my lyres repeated this mistake, since I glued them at functionally the same time.


Once the lid went on, I was able to file the edges flush and sand out all of my tool marks.

I copied my peg spacing from my existing instrument and drilled the pilot holes on the drill press. My laurel had a spare set of tapered peg tools, so I was able to ream the holes out with those. The taper lets the friction pegs work, setting their tension by pressing them manually into place. I carved the pegs from maple for both instruments. I tried mahogany at first for the 3-string, since interchanging the woods would be pretty, but the mahogany broke in half during the test fit, with no string attached. So that was a bust, and I had to start over.

Oops again


After sanding the instruments to 400 grit, this is the point where the posts diverge, because I finished one instrument long before the other! Stay tuned for Finishing Out the Jouhikko.

Monday, September 2, 2024

Jouhikko project part 2: design

Having covered my various sources of inspiration, a discussion of design will now make sense. 

My initial plan was to build a single three-string jouhikko inspired by the Sutton Hoo lyre. This would make for a simple, rectangular body with rounded corners and minimal deviation from the instrument I already had. 

Recreations aside, my other goals for the project were twofold. One was to carve the body from a single piece. There are two ways of building a lyre; the more modern way is to assemble it from individual pieces, as one would a guitar or violin. Single-piece carving is the traditional way, which appears borne out on the Anglo-Saxon model lyres as well. Having tried instruments built both ways at the coffee shop, I was more taken with the unibody sound. My other goal was an arched back. That one goes back to playing the Irish bouzouki as a teenager. Having played the standard guitar-construction Trinity Hall model, then tried an arch-top, the difference in sound was monumental. An soundbox with parallel sides can create standing waves inside it, where some of the sound bounces back on itself and cancels itself out. This is definitely not a feature of the original lyres, which were rather flat and would fit comfortably inside of a modern 2x10, but the depth of an instrument isn't terribly obvious while it's being pointed at the listener.

I would also be including violin-type internal bracing - a soundpost and bass bar. The soundpost goes near the treble side of the bridge to support the face and bridge, while the bass bar passes directly under the bass side at a slight angle to the face grain. This stiffens the soundboard, strengthening it and helping it transmit long-wavelength bass vibrations well.

Violin bout cross section


This is my initial plan that I drew up, drawn to scale of 1 square = 1/2". Most measurements were copied from my existing instrument, with radii and such determined by scientific eyeball. This plan includes a faceted back that I hoped would be feasible to carve out. There's also the matter of the yoke. 


The Sutton Hoo lyre had joinery halfway down the arms. This is outside of my projected capabilities for good joinery, so I opted for a tongue and groove joint directly on the yoke.

My early aspirations for building a lyre included a turned button, but considering that I don't have easy access to a lathe, that would be impractical. Instead, I included a hook carved into the end like the Trossingen lyre. This doesn't involve using any processes I wouldn't already be doing.

On Patrick's advice, I made a physical mockup to see how it feels in my hand. The usual idea would be to use cardboard, but since I didn't have cardboard handy, I grabbed a sheet of pink foam. This let me also check dimensions on the depth of the arms, since it was an inch thick.

The rubber met the road about a month before W-AT War, when Patrick invited me for a shop day which would be a couple of weeks before. This was in conjunction with me having the idea to actually make a Trossingen-inspired lyre, and Patrick encouraging me to make two lyres, one of would be four strings.

With some direct inquiries into what tools would be available, I had to work fast reworking my plans and getting materials together.

On the materials side, my laurel offered me a spare set of spruce soundboards and a peg reamer and shaper. The good wood store sold 8/4 maple, which could be in 6x2" widths reliably. On the plus side, the maple is reasonably priced, on the other, I had to buy the whole ten foot board. So, that was two jouhikkos, a section to break out on the table saw, and a four-foot piece for an eventual tagelharpa cello. I also got exceedingly lucky in that for a mere $40, there was an unmilled three-foot mahogany board which was two and a half inches thick by eight wide. This would be enough to make the four-string instrument.

Maple is considered the ideal tonewood, its hardness making it good at clear treble. Mahogany is a first aesthetic choice, and a second acoustic choice, making darker-sounding instruments in general. This should work out well for a four-string instrument, perfectly engineered for outputting Sad Viking music.

Now I had to sort out what the final shapes of my instruments would be. Remember that nice scale drawing? Throw that out. Well, maybe not throw it out entirely, a lot of the lengthwise landmarks are still useful, but it's not seeing the light of day entirely as written.

My decision finalized with a three-string Trossingen jouhikko and a four-string Sutton Hoo tagelharpa. The latter is simple, as it basically involved adding an inch to the width of the instrument to add room for an extra string. The Trossingen design involves some careful consideration. 

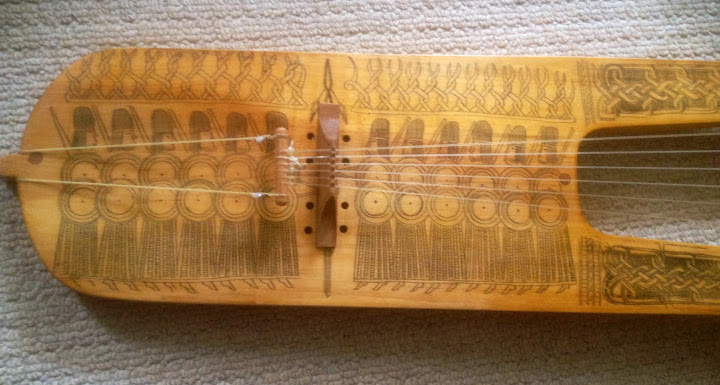
The original Trossingen lyre, for reference

The original lyre has a round bottom, a contoured yoke, and more importantly, trapezoidal arms and a narrow box. Given that jouhikkos are some variant of rectangular, I was on my own to invent what this would be. Keeping all the relative lengths together was a given - altering those would change a lot of things in ways I couldn't predict easily. This would mean the proportions would be radically different than the original, much like the Sutton Hoo version. But I could still evoke what I wanted by keeping the yoke its original width and narrowing the soundbox. The question was by how much.

I measured the angle at which my strings fanned out and determined that the strings drew closer together by half an inch between the peg and the body. The starting distance between the string and the inside of the right arm gives the room you need to put your fingers through the back of the instrument and work the strings. Too much distance here isn't the end of the world, but it can make it harder to reach the middle string. Too little, and you can't avoid brushing the string with your fingers on accident. 

On a normal jouhikko, the arms are straight, but the strings converge towards the bridge. This moves the string away from you as you try to play in higher positions, with the arm supported by your hand. By narrowing my soundbox 1/2" per side according to my measurement, not only would I get the look I was after, I would keep my melody string parallel to the arm as far as I could reach, thus making playing in higher positions more consistent.

It was around this point, considering how much time I would have to actually get my instruments as far along as possible, I abandoned my original arched back idea. That would be a royal pain no matter how I did it, and using unfamiliar tools, I would have an excellent probability of messing up. I then realized a feature I had seen on other lyres and now figured out its purpose - a simple thickness taper from the butt to the shoulder. This keeps the two faces of the instrument out of parallel and does much the same job. A quarter inch taper should be plenty.

I drew up a pair of posterboard templates to trace onto my wood, and after some foam mockups, settled on my plans.


With the wood blocks shortened to fit in my luggage, the patterns traced, and my bag carefully weighed for 50 lb of supplies, it was time to carve.

Sunday, August 11, 2024

Jouhikko project: Part 1

You thought I was going to talk about building instruments. Haha, gotcha.

This is actually

PROLOGUE 2: DOCUMENTATION AND RATIONALE

So you want to be a Viking bard...

This is easier said than done. We don't have anything resembling Viking written music, or indeed any way to make sense of it if we found some. We have some poetry, like the Eddas, and those can be made into ad hoc songs. This is how we got My Mother Told Me, which is a couple stanzas turned into a sort of sea shanty for the Vikings TV show.


Colm's pronunciation differs from the possibly more grounded pronunciation that Jackson Crawford uses, but hey look, he's playing a jouhikko!

Problem is that this is a totally modern interpretation. Maybe we'll have rolled the dice and landed on exactly how they'd have done it, but let's be real: we're in the dark as to how compositions actually went. We have a pretty good guess that poetry accompanied by a backing instrument would have been common, but without any way of knowing how they'd have played them, all we can do is try to rebuild what they had and play the instruments based on regional traditional styles - they're the closest thing we have to the surviving musical sensibility, though even they will have evolved considerably. This Hurstwic article lists references to music in the sagas, but the references are few and far between. Being a musician was seen as a mark of prestige, much like being a skilled poet, but beyond that, not much is to be had.

Most records of music in the area come after the rise of Christianity, which isn't a reliable gauge of what the culture would have been like before.

Looking for extant instruments is also tricky. While we have great records of hygiene tools and other small organic items, instruments actually belonging to the Vikings are remarkably few and far between. From 10th century Birka, there is a simple bone flute. From 10th century Jorvik, there is a set of pan pipes, drilled into a single piece of wood. This has enough surviving holes to play five notes, though the break on one side of the piece suggests at least two more higher notes were available when it was new.
 
schematic of the jorvik panflute
Tiny drawing c/o https://panflute.net/history-of-the-panflute.html


There also exists an unfinished, possibly damaged in construction, amber bridge for some sort of string instrument. This was found in Dorestad and dates to the 9th century, but what exactly it went to is uncertain. Judging by string number and spacing, a six string lyre seems likely, but even that educated guess as to genre leaves us with a useless number of possibilities.


That was illuminating, but unhelpful. What evidence are you actually using?

So for relatively intact lyres, the Anglo-Saxons and Germanic tribes had better luck than the Vikings did. Two prominent survivors are relevant here. The first is from the 7th century Sutton Hoo burial. The body of the instrument does not survive, but the arms, yoke, and two metal ornamental plates do - for some value of the word.

via Wikipedia, the surviving fragments

 
Of some note is the joinery - the yoke is a separate piece from the rest of the instrument, attached by a sort of pyramidal peg joint partway down the arms. The yoke has its grain perpendicular to the rest of the instrument, so that stress from the pegs doesn't risk tearing out the wood. The arms are mostly hollow, with a soundboard nailed on with bronze pins. The body of the instrument is maple, and came with a beaver pelt carrying bag. Reconstructions suggest a deceptively simple straight-sided rectangular shape with rounded top and bottom.
 
© The Trustees of the British Museum. Shared under a Creative Commons Attribution-NonCommercial-ShareAlike 4.0 International (CC BY-NC-SA 4.0) licence.


Meanwhile in Germany, the Trossingen lyre remains in remarkably good condition. The arms are slightly angled outwards, most or all of the pegs are still in place, and the bridge is even still present. The face is richly engraved with a scene of a shield wall.

By No machine-readable author provided. Opodeldok~commonswiki assumed (based on copyright claims). - No machine-readable source provided. Own work assumed (based on copyright claims)., CC BY-SA 2.5, https://commons.wikimedia.org/w/index.php?curid=644808  
 
These aren't the only examples of such instruments; we have a small assortment of instruments matching this general form from around Northwestern Europe and Britain. The bow, however, lacks documentation from this time period, or indeed, much documentation at all. Our earliest example comes from the Klosterneuburg psalter, which features an illustration of King David not with his usual harp, but with a bowed lyre, along with two other musicians on similar instruments. This is from the 1100s.
 
 
The Trondheim Cathedral, opened in the 1300s, features a grotesque of a man very clearly playing a jouhikko-like lyre. The artist must have either been familiar with the instrument or referenced the pose, because the player is playing with the backs of his fingers (as is traditional), sitting down, and gripping his bow correctly.


I wouldn't personally hold it tilted that far over, but in context, there's a pillar immediately to his left, which he's craning his head around. I've broken bows by lack of spatial awareness before, and also had to cram into tightly packed sessions, so I can hardly blame him for scrunching his posture.

The jouhikko itself is a traditional Finnish instrument, played with the backs of the fingers. It's traditionally carved from a single piece of wood, though it can be built other ways, and exact planforms vary. Some have tight hand-holes that only let you reach two strings with your fingers; others have slender arms. Some have large pyramidal blocks with holes at the bottom end to admit the tailpiece cord; others have square bottoms and buttons like a violin. Styles of playing include flat-bridge designs where all strings drone at once, which is common for four-string tagelharpas, or curved-bridge designs where only two strings are played at once. The latter approach is the usual for three-string instruments. The instrument's traditional modern practitioners include Lassi Logren and Rauno Nieminen as authority figures, alongside some less traditional pagan bands like Wardruna.

And that's basically it for historical documentation. The bowed lyre is something of a dark horse, and preserved actual instruments are nightmares for archaeological survivability - thin organic materials decay quickly, and one could imagine that high value items like those often didn't become grave goods. Someone wealthy could perhaps afford to bury a lyre, but one could just as easily see a good instrument getting handed down through the years until it fell apart.
 

What does this mean for a reenactor's jouhikko?

No part of what I'm doing is neatly documentable to my own time period, so I'm stuck speculating no matter what. The upshot of this is that I'm free to put my own spin on the project, because my layman's guess is just as wrong as anyone else's. My approach will be to make instruments that blend in with traditional plucked lyres, but still are functionally jouhikkos. Due to fortunate material availability and an extra dose of ambition, I'll be building two instruments: a four-string flat-bridged tagelharpa based on the Sutton Hoo lyre, and a three string curved-bridge jouhikko based on the Trossingen lyre.

Friday, August 2, 2024

Jouhikko project: Prologue


Years and years ago, one of my crafting inspirations (who currently is living the dream as a blacksmith down in Pennsylvania), built a Sutton Hoo lyre, and I thought that was the coolest thing. I've played instruments since I was but single digits of age, and the art of constructing an instrument was something I never thought I'd be able to do on my own. But, to be able to have a period Viking instrument (or as close as possible to one, more on that later) would be amazing.

A few years later, my dad and I built a CnC machine. I used it for several projects, but it eventually fell victim to the need for streamlining and some construction difficulties with the gantry. I never got around to my goal of CADing out a lyre and carving one that way. Not only would that solve my confidence issues, in that all the precision work would have been done by a robot, but it would also eliminate most of the need for tools - at the time, I lived in a literal hotel room. 

So, that dream languished for probably most of a decade. I got to handle one of the lyres on a return visit to my old friend's neck of the woods, but that was as close as I came. 


Last year, I discovered what a tagelharpa was, along with its structural twin, the jouhikko. Not only was the rustic droning sound fantastic, it filled essentially the same niche as a regular lyre for something portable and period I could take to bardics. My old beat-up ukulele (which I had re-tuned as a mandolin stand-in) just wasn't the same, obviously. The jouhikko would also be nice because I have ten years of fiddle experience; thus, I wouldn't have to worry about that part of the learning curve. 

I also found a website that claimed to sell bowed lyres on sale for about $300, which was a fairly affordable price. Lesson learned - don't buy from Staghelm, no matter how good the price is. As of 2024, I don't think anyone on Reddit can prove they've produced a single instrument in the last year, and they certainly didn't make mine. They also didn't make an effort to dispute paypal the second time, so at least I got my money back. But, on the way back from GWW last year, I got into a conversation on Facebook with another SCAdian named Patrick. We'd met briefly at the one event I had gone to in his neck of the woods, and I was impressed with his selection of instruments (which probably included the jouhikko, but I didn't retain the info at the time). But we hadn't really interacted since until we ended up talking about my Staghelm that was probably going to need some TLC if and when it arrived. 

Fast forward to December, Patrick and I met in a coffee shop one morning. It was an absolutely chaotic trip, given that his city is easier to reach by plane than car, but I came back with a loaner jouhikko. That turned into an opportunity to talk more about instruments and their design and building, which culminated in an invitation to Patrick's shop in June. It was, again, something of a chaos trip, given that it was the single free weekend for a month on either side of it, but we had a grand time getting my instruments roughed out. Since then, I've been on my own to do the remaining work. My woodworking time has been divided between 20 minute at a time borrowing the shop at work, and a few weekends of actual work time on the porch.

This is my most complex bit of woodwork so far, and I've put a great lot of thought into it, so this will probably be multiple blog posts as I catch the documentation up to my actual progress.

Many thanks to Patrick, without whom I would undoubtedly be flailing about blindly.